So a few weeks ago I set myself the challenge to make myself a poncho (who doesn't like a warm snuggly thing)... And then my inner crafter and inner geek collided. My plan for a simple poncho morphed...
May a present: The Moogle Poncho.
Armed only with my wallet I plunged headfirst into the haberdashery. I ferreted in corners, searched through carefully stacked bolts of cloth and even fought a little old lady for the last piece of purple felt, but finally I came out with my arms full, and my wallet empty.
I settled down that evening with my purchases scattered around me. Part of me was chuffed, the other already defeated... the things is, I'd gone into the shop on a whim. I hadn't prepared. I had no pattern. No plan. And now I had lots of white fleece and some scraps of felt that I had to somehow transform into an item of clothing.
I cast my mind around. Willing it to land on something I could work with. My eyes came to rest on our DVD and video game's cabinet... I took a deep breath and set to work.
Moogles are little benevolent characters from the Final Fantasy video game series. They look like this:
Adorable huh?
Well, my Moogle looks like this:
To make your very own Moogle poncho you will need:
- 2 metres of white/cream fleece
- White thread
- Red thread
- Purple thread
- Red material
- Purple material (I used felt, in two shades)
- Needles
- Pins
- Scissors
- Fabric pens
- Wrapping paper, or dressmaking sheets
For the pom-pom
- Red wool
- Cardboard
1. I vaguely remembered my textiles lessons at school where we had cut our designs out of newspaper before cutting into cloth, so I pulled out an old roll of wrapping paper and used it to create a template. With Hubby's help I drew a 1.5m diameter circle on the paper, which I then carefully cut out and then pinned to the fleece.
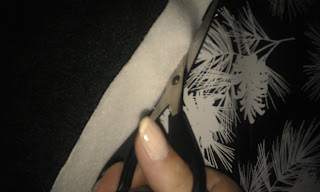
2. I was amazed how much space this took up as I sat in the middle of our living room kneeling under our dining room table, but I carefully laid out the pinned template and cloth on the floor to ensure that both pieces were flat before I went to the part of no return - the cutting. Make sure when you position your template that you position it to one side of the material as this will leave larger off-cuts on the other side for making the hood.This bit will form the body of your poncho, so take care with your cutting. The fleece doesn't need hemming, so be as neat as you can.
3. Once cut out, remove the template from the fleece and put the material circle to one side. I then grabbed an old hooded top and some more wrapping paper. Place the hoodie shoulder down on paper and draw around the hood. I wanted a larger hood that on my hoodie, so I was generous in my tracing of the hood giving it an extra 2cm on each side. Use this template to cut out two pieces of fleece. Place together and sew up two sides to make your hood.
4. I then settled down in front of the TV to make a pompom. Cut two doughnuts out of cardboard, place together and wrap red wool around them until you can't fit any more through the little hole. Depending on the size of your pompom this can take a little while. Carefully cut around the edge of the circles, slipping another piece of wool in between the two card disks to secure the pompom together. Make sure you leave a long tail of wool.
5. Using a needle, take the long wool tail of the pom pom and push it through the top seam of the hood. Tie a large knot inside the hood to prevent it coming out... Your Moogle is starting to take shape!
6. Return to your large circle, and cut a slit no larger that the width of your hood for the neck in the centre of the material. Carefully sew the hood onto the body of the poncho.
7. Pop on your hooded, pompom-ed poncho and run around squealing about how clever you are (or that may just be me).
8. Next is the fun part when you position your Moogle's features. It's not quite so easy to do this when the hood is attached, but by adding them at this stage it means you can adjust them depending on how the hood falls. Cut out a Moogle nose shape from your red material and stitch this at the front of the hood with red thread so that when worn it falls in the middle of the wearer's forehead.
9. Cut out some ears from any white fleece you have left over and sew into position
10. Using a black fabric pen (I used DYLON Fine Fabric Pens) draw some Moogle eyes (very thin crescents) onto some of the fleece off-cuts and, once dry, sew into place.
11. Finally cut some wings out of the purple material and sew onto the back of the poncho where the hood meets the neck.
(Okay, so I managed to stitch mine one wonky... but I think it adds character!)
My Moogle likes nothing more than curling up in front of the TV with a cup of tea. Good Moogle.


No comments:
Post a Comment